Parchment Craft Beginners – Dorsing

Dorsing is a technique for colouring parchment. You can use Dorso Crayons but Oil pastels or Polychromos Pencils will also work well.  The crayons are applied  on the back of the parchment (usually but not always) and then rubbed with a folded piece of kitchen paper plus a tiny bit of medium to smooth and blend, this gives a really subtle background colour for parchment craft projects. Below is a step by step guide.

Using the dorsing technique you can also create rainbow parchment paper or simple backgrounds to go behind your parchment craft designs.  

Pergamano Dorso Crayons  – two sets available

How to Dorse

You will need

Parchment craft paper, crayons, medium and kitchen roll

Medium

You can use Dorso Oil, Zest It, or White Spirit (Mineral Spirits), I think Barbeque fluid also works, or any other medium.

Just follow the few steps to create coloured parchment paper:

Put the sheet of parchment onto a hard clean surface and fix into place if possible

Make sure that the crayon you are using has an angled flatish surface – if you do not have a slanted broad surface on your crayon, carefully cut the end to the shape below

Apply broad strokes of colour – don’t use a point

fold the kitchen roll into a pad and drop a couple of drops of medium onto it

use circular movements to spread the colour evenly  onto the parchment

Rub until you can no longer see the strokes

Not quite finished

How to Dorse more than one colour

  1. Start as before
  2. Apply the colours in wide stripes – diagonal – zig zag – wavy lines – or whatever you want
  3. Smooth out the colours one at a time using a clean piece of kitchen roll with a tiny drop of medium for each colour
  4. Then gently merge each joining line so that the colours fade into each other. Keep refolding the kitchen roll so that it is clean – use medium as required.

Alternatively:

Fold the kitchen roll and apply a tiny drop of medium as before but apply a small amount to the plain parchment

Then rub the kitchen roll on the crayon and apply the colour to the parchment paper in circular movements.


Faber Castell Oil Pastels

Troubleshooting

Uneven effect after using the medium  – Use a little more medium

Colour disappears  – Use less medium

Too much or too little colour – Apply less or more crayon – best to practise on a piece of scrap first to see how the colour works out.

Experiment with Dorsing

Try experimenting with low tack tape to mask areas you do not want coloured – create stripes, checks, patterns as backgrounds for your designs.


Parchment Craft Tools and Equipment – Grids – A Beginners Guide

History of Grids

The original Pergamano grids for parchment craft were ‘wire mesh’ enclosed within a plastic frame. They are still available second hand – they were discontinued in favour of the metal Multi Grids some years ago. There are still some tools associated with the mesh grid available:  the ‘Diamond’ perforating tool and ‘Triangle’ perforating tool and also the ‘Arrow’ perforating tool.  image-7

Pergamano Easy Grid


Pergamano Multi-Grids

The Multi Grids are a series of stainless steel designer grids. They are mostly A5 in size  (grid no 28 is A4 size).

image

Tools Required for Multi Grids

You can emboss and perforate using the grids. Use the Single needle tools for perforating and the Stainless Steel Fine Stylus and Extra Small Ball tool for embossing.
For Perforating – Single Needle Tool and Single Needle Bold
For Embossing – Pergamano Extra Small Ball 1mm and Fine Stylus 0.5mm
Most of the Multi Grids have designer patterns and themes for you to mix and match on your cards. These cards were made using Pergamano Multi Grid no 33 Butterfly Kisses and  no 36 Summer Garden. There  are four plain grids to use for making your own designs or making use of gridwork patterns from books, patterns or DVDs.

Diagonal Multi Grids

A Pergamano Diagonal Grid has holes offset at 60 degrees

 
Diagonal: No 19 – Bold
Diagonal  No 24  –  Fine

Straight Multi Grids  

Straight Grid:   No 4  –  Fine
Straight Grid: No 28 – Bold

Tips for using  Pergamano Multi -Grids

This method shows you how to emboss using the grid – and then perforate using the grid

  1. Attach parchment paper to the grid with removable magic tape or masking tape.
  2. Place the grid on an embossing mat and emboss where required. Pergamano recommend that the Stainless Steel ball tools are used on the Multi Grids:  Fine Stylus 10032 and Extra Small Ball Tool 10072. If no embossing is required go to step 3.
  3. Turn the Multi-Grid over, with parchment still attached, change the mat to a deeper perforating mat and perforate the pattern using a single needle tool 10241.
  4. Remove the the parchment paper from the grid and using parchment scissors or Perga Cutters cut out the perforations where necessary.

If this method does not work for you take the parchment off the grid after embossing, turn it over so that the right side is facing you and carefully match the embossing pattern up so that your perforations will be in the right place. Fix the parchment down on the grid with tape, make sure you have changed to a perforating pad and perforate where required.

New to grids?

A Bold grid is easier to use if you are a beginner -you will need a bold perforating needle as well.

Can I use Pergamano tools with PCA grids?

No, the needles don’t fit very well. It’s best to stick to the tools that match the grids. The Pergamano single needle works well in the Siesta grids and Groovi grids.

PCA – Parchcraft Australia – FlexiDuo Grids

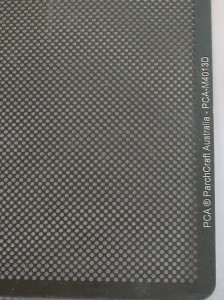
PCA grids are all A4 size and made of a flexible steel  –
image-1 image
PCA BOLD STRAIGHT                            PCA FINE STRAIGHT
As well as the Straight grid, PCA make a Diagonal Grid the holes on this grid are offset at 90 degrees – same as the straight grid.
image-2
PCA BOLD DIAGONAL                 PCA FINE DIAGONAL

Tools required for PCA FlexiDuo Grids

For perforating use PCA Unifine tool, and Unibold tools in the PCA Fine and Bold grids
Once you start perforating the parchment is fixed to the grid and won’t move. You can also use the PCA twin, quad, oct tools and many more on the grids
For embossing use Small ball on the Bold grids and Micro Ball on the Fine grids

Tips for using PCA grids

This is the order to place the mat grid and paper ( bottom to top)

*****************************************

Perforate with either a Unibold or a Unifine according to your grid and pattern.

Fourth: Place the parchment paper on the grid ‘right side up’

Third: Place the FlexiDuo Grid on the top

Second: Place a tumble drier cloth on the perforating mat (optional) Tip – the tumble drier cloth lubricates the perforating tools so they don’t ‘stick’

First: Place an A4 perforating mat on the table.

******************************************

Make a little sample (one pattern repeat) of your design on scrap parchment, then you can use the perforated sample to, perforate or check the holes are in the right places as you move through the pattern.

Embossing Dots on a PCA grid

  • If your pattern requires embossing and perforating it is usually best to emboss before you do perforations, but follow your pattern instructions for best results. The parchment paper should be ‘front side down’ if you are embossing dots.
  • Use an embossing ball tool  slightly larger than the holes in the grid. (small ball for bold, micro ball for fine)
  • You can emboss dots with the grid on a hard surface (no mat)

Siesta – Designer Grids

image-1

image-1

Siesta Designer Grids, Medium Grids and Small and Large Grids  and Ruler Grids are also made from steel. Most of the small and large grids come with a free perforating mat. The Ruler Grids come in a range of designs for making easy borders. The designer grids enable you to decorate parchment paper with motifs, borders, frames, corner embellishments and more. The Medium Grids have a range of flower motifs and patterns for a fan.

:

image-2

Plastic Grids from Groovi

The plastic regular grids are also in either straight or diagonal similar to the Pergamano grids.


A4 size grid in Straight and Diagonal types (above) – there are also smaller plastic grids available 148mm x 148mm (below) in both straight and diagonal

 Border Grids with perforating patterns / designs

Just follow the pattern on the plastic border plate grid.

Tina Cox’s small guide books for Groovi Piercing Border Plates.

More Help

image-7

Grid and Lace Work DVD is an excellent instructional DVD by Christine Coleman -learn how to use PCA grids while completing several projects.

image-3

Best of the Best 2 GridWork  by Kannikar Sukseree – a collection of gridwork designs to use in your projects

Parchment Craft Basics – Tracing

Tracing and Parchment craft 

Welcome to a new series of basic techniques and tips aimed at beginners starting parchment craft.

Tracing is usually the first skill you learn for traditional parchment craft.

Parchment paper is translucent and so it is easy to trace, from a line drawing or picture, on to the parchment.

Depending on the finished effect you want, you can use tracing to highlight your design or just use it for guidelines, which are erased in the end.

Here is a link to a video showing you how to trace.

Methods of Tracing on to Parchment Paper

The simplest method is to lay the parchment onto the paper pattern and fix together with low tack tape. Working on a hard surface like card or design board, then use a pencil or pen to follow the pattern.

This can be done with sharp white pencil, or an ordinary pencil,  white or coloured inks a mapping pen and/ or a coloured fineline pen like a white gel pen, or coloured Pigma Micron pens.

Trace with white pencil or pens?

White pencil – use either a mechanical pencil with white leads or a Pergamano White Pencil in the above design the head of the lady has been traced, then the parchment turned and the lines embossed on the back – the pencil on the front is then erased.

Ordinary graphite pencil can be used if you find the white pencil is difficult to see. It is of course, erased afterwards.

The above flower is traced in white ink, this can be done with a white gel pen or mapping pen and white Tinta ink- this gives a different look to the parchment. The line should be really fine for the best effect.

One of my favourite designs from Christine Coleman

Trace with coloured Tinta ink- black for example can give a design , impact.

What do you need

So, to get started tracing you need parchment paper of 150 / 160 gsm and a white pencil/pen or mapping pen and ink and a pattern or picture, a piece of card or a design board to work on. Also you might need, low tack removable tape, a piece of black paper (see tips), a pencil sharpener, an eraser pencil or battery eraser, coloured fineline pens, a pad of kitchen roll to rest your hand on.

Tips for tracing

  • If using a white pencil always keep the point very sharp.
  • Keep a small piece of black card handy to place underneath the parchment to reveal where you have traced and where you have missed a line.
  • Use pencil /pen lightly, don’t press to hard
  • To prevent ‘shaky hand’ – brace the side of your hand on the table and practise drawing an arc smoothly.
  • Keep turning the parchment so your hand is always in a comfortable position.
  • Use the pencil/ pen as vertically as possible.

No tracing 

If you are going to colour the centre flowers with polychromos pencils for example, there maybe no need to trace as you can fix the parchment to the pattern and colour the parchment directly over the line drawing.

Mechanical Pencils- How to Install White Leads

Refilling a Mechanical Pencil

Here is a question that is asked all the time. How to put the white lead refills into a mechanical pencil?

If the mechanical / automatic pencil is new it will be installed with two or more graphite leads. These will need to be ejected before the white leads are installed.  Just pump the end cap with your thumb to push out the installed graphite lead. There may also be leads stored in the barrel – follow the instructions to remove the end cap:

To refill the mechanical or  automatic pencil

Firstly take off the silver cap to reveal the eraser – also pull out the eraser carefully

If there are any graphite leads in the barrel they can be removed and replaced with a white lead. Replace the eraser and cap then pump the end cap a few times to reveal the new white lead.

Tips for using a mechanical pencil

  • White leads are very fragile, only push out the lead a bit at a time
  • Always use lightly they are not as strong as graphite leads
  • Try to use the pencil as upright as possible to prevent breaking leads
  • If the lead just recedes as soon as you try to use it it is probably just not long enough for the pencil to grip effectively – so you would need to replace the lead

To buy mechanical /automatic pencils and white leads click this link


Parchment Craft Questions and Answers about Parchment Craft Paper

Thank you to the parchment crafters who have taken the time to find my blog. This weeks questions are all about parchment craft paper.

What is the best parchment craft paper to use?

Parchment crafters or Parchers usually work with three main weights. 160gsm, 150gsm and 140gsm.

140gsm , 150gsm or 160gsm

(gsm = grams per square metre) this is a European measurement term –  specifically measuring  paper

I am focusing on the following questions:

What is the best paper for a beginner?

What difference does the weight of the paper make to embossing and perforating?

What is the most popular paper?

Here are some thoughts collected from tutors and parchment crafters about the qualities of the different weights of paper. I need to thank parchment craft tutor Sharon Mills for collecting all this information. I hope this is helpful to any beginner looking to buy some parchment craft paper.

While you are reading this blog, think about how you emboss, would you say you were ‘heavy handed’ or ‘light handed’?

Working with 140g paper

This was quite a popular choice with some of the more experienced tutors. It is ideal for embossing and perforating and some painting. When Embossing this weight of paper – it is thinner so  you need to be gentle, but on the other hand the paper warms and stretches with the lightest of touch so will be easier to work.

This parchment allows the perforating to feel easier and smoother.
When re-perforating  take care not to push the snips or scissors in too far, this weight is more delicate than 150g or 160g.

If you are doing a project with a lot of grid-work and cut-work – my opinion would be to recommend 150g or 160g.

However this lighter weight is easier to cut with the snips or scissors.

This weight is more cost efficient.

Working with 150g paper

This is a very popular weight stronger and favoured by a lot of  well known designers and tutors. Pergamano paper is usually 150g.
An excellent all purpose weight for embossing, perforating, pencil work and painting, ideal for using with the PCA templates or the Groovi system  and also when working with the metal grids.

150g paper embosses, perforates and cuts nicely .
It is just a little more costly than 140g paper

Working with 160g paper

This is a more robust parchment also widely used. A lot of parchers have used this weight paper when they have been taught at workshop/ retreats.  I like the 160g paper, but it is thicker – so as you work it – be careful not to tear the parchment especially when cutting or snipping. I would use this for the larger more intricate pieces of work, it’s ideal for everything including painting, pencil work.

Important tips for all weights

Parchment craft paper is a delicate medium, so care should be taken at all times ,no matter what technique is being used.

It is highly absorbent so be careful to have dry hands, and if painting, do not use too much water.

When using the parchment no matter what weight- change embossing mats to suit the Parchment you are working with.

Embossing mats briefly

Embossing mats are much thinner than perforating mats, there are several types available: the softest is the foam mat such as the Pergamano Blue mat, a medium soft  mat is, for example, a silicone mat such as the Pergamano Pink Mat (sold in a tube), and the hardest mat is the rubber mat.

With both parchment paper and mats you have to try different combinations out to see which works best for you. If you are heavy handed, for example, perhaps a rubber mat and 160g paper combination might work. Many beginners find they are heavy handed at first but as they get more experience they get lighter handed.

How can I keep the parchment paper from curling so much when parching?

Parchment paper is very absorbent, and if you have hot hands this will make it curl. Use a parchment protector or a piece of folded kitchen roll between your hand and the paper. Also when you leave the parchment overnight, or to rest, I think it helps to place the parchment under a book – so it rests in a flat situation.

How do I avoid so much cracking as I parch and perforate ?

If the parchment is cracking you are probably doing too much too quickly. To prevent the parchment from fracturing – when you perforate and emboss in the same area – the technique is to mark the perforations by ‘shallow perforating’, then emboss, then re- perforate deeper using the marker holes of the shallow perforations. Also check the type of parchment you are using is it 140g, 150g or 160g? It may work for you with a different weight paper.

 I want to whiten my project more but it seems to not be able to – or that’s when it fractures maybe I am still going too fast or maybe the embossing pad isn’t suitable?

Yes it is possible that you are trying to work too quickly. Try to work slowly layer by layer. Start with an Extra Large or Mega ball tool and emboss lightly for the first layer, leave the parchment to rest and do something else for an hour. The next layer use a Large ball tool and rest the parchment again, continue using smaller ball tools to get the whiter effect, leave it to rest after each layer, work like this until you are happy with the result. There is some advice for mats above but maybe you need a harder mat such as a rubber mat.


Rubber Laminated Mat from Perfect Parchment Craft

I can thoroughly recommend a small project based book by Dorothy Holness called ‘Embossing Step by Step’ available from Perfect Pattern Box as a downloadable book.

Do you mail products to the US? Or know anywhere in the US I can buy these products?

I know it is difficult to find the equipment for parchment craft in the UK ,which is where I am. I do not know of shops in the US but if anyone does –  and wants to place it in the comments section please do. Perfect Parchment Craft does ship world wide.

PCA Templates for Parchment Craft – Part 5

PCA Parchment Protectors

Parchment Craft paper will absorb any oils from your hands while you are working and you end up with a greasy mark which is difficult to remove. PCA have designed four different shapes of Parchment Protectors that you can place between the parchment and your hand whilst perforating or colouring. Besides keeping your parchment clean the grids  are useful to keep lines straight if you are embossing or perforating a row of dots or holes. The various shapes of holes will enable you to work in any awkward spaces.


PCA Templates for Words and Sentiments

PCA make templates for words and sentiments so that you can emboss the sentiment inside the card or on the outside.

Simple sentiments like Happy Anniversary, Thinking of You, Season’s Greetings, Happy Birthday, Merry Christmas, Thank you and With Love all in seven different fonts with added little motifs to use as a finishing touch.  These can all give your card a really nice finish.

PCA also produce templates in various fonts in Bold and Fine with the whole alphabet in upper and lower case including numbers.

The best seller for word templates is the PCA General Occasions Words Cursive

This is the final part of the PCA Template series, please let me know if you have any comments or questions.

PCA Templates for Parchment Craft Part 1 Frames, Borders, Corners and Backgrounds

PCA Templates for Parchment Craft Part 2 Pictures

PCA Templates for Parchment Craft Part 3 Edge Templates and Guides 

PCA Templates for Parchment Craft Part 4 Easy Cut Templates


PCA Templates for Parchment Craft – Part 4

PCA Easy Cut Templates 

PCA EasyCut templates are made for parchment crafters. They are a brand new set of frames that you can use with your own designs or other embossing templates. Also, there are EasyCut project templates like Pot Pourri Box, Butterfly, Star and Pillow Boxes that you can make up quickly and easily without having to spend hours cutting out.

There are many frames you can use – here is an example of the curvy label frame, there are 6 sizes of Curvy Label Frame on the Easy Cut Template:

Easy to use you just emboss along the tracks with the recommended ball tool, then use a Scriber or Craft Knife along the tracks to cut the parchment paper.

There are also EasyCut Card templates:

Here is an example of the finished card – embossed and decorated:


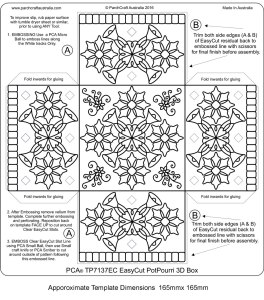
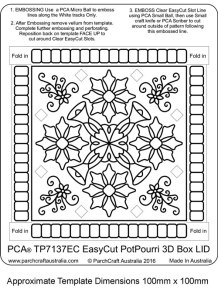
The projects are really pretty – here are the Pot Pourri Box and Star


tp7137ec-easycut-potpourri-box-template__11641_zoomtp7137ec-potpourri-lid-template__95599_zoom


First step below shows the parchment paper embossed using the template (simply follow the tracks with a ball tool )

tp7137ec-easycut-potpourri-box-vellum__06337_zoom

When you have embossed the two templates cut out the box and lid. To do this just follow the tracks using a scriber tool or craft knife following the instructions on the template.

The finished box

tp7137ec-easycut-potpourri-box-assembled-1-meas__14938_zoom

The Star

Also available are templates for pillow boxes, butterflies and here is a new design due in a few days:

You can make this stunning lacy frame and flower posy from Templates TP3424E and TP7151EC -available soon  from middle of June –

PCA Templates for Parchment Craft Part 1 Frames, Borders, Corners and Backgrounds

PCA Templates for Parchment Craft Part 2 Pictures

PCA Templates for Parchment Craft Part 3 Edge Templates and Guides 

PCA Templates for Parchment Craft Part 4 Easy Cut Templates

PCA Templates for Parchment Craft Part 5 Parchment Protectors and Words /Sentiments

Book Review – Parchment Perforating Guide by Tina Cox

The Parchment Perforating Guide is a Clarity book, Artwork by Tina Cox – it focuses on Gridwork using the Groovi Straight Border plate number 1, but has a huge amount of help and advice for beginners to parchment craft in a very clear, step by step approach.

The Groovi Straight Border Plate 1 has 5 basic gridwork patterns ready to use.


GRO-GG-40350-14_Groovi_Grid_Piercing_Plate_Straight_1_1000px_large

In this book there are 15 ‘easy to make’ card designs  ending with a final big project bringing all the skills you have learned at the end. The instructions are easy to follow and give you a list of the equipment you will need for each project.

A very handy spiral bound small book 6” x 6” . I like that it sits flat on your craft table and the size means that it won’t take up much space.

In summary this is a  great little book for beginners, a useful size, step by step clear instructions and photographs and loads of beautiful projects to work through making this a fantastic buy for anyone wanting to learn how to create decorative edgings for their Groovi projects.


PCA Templates for Parchment Craft – Part 3

PCA EasyEdge guide Templates  

What are PCA Easy Edge Templates and how can they help a parchment crafter?

When you have finished the central part of the card but still have the edging to create, PCA templates can really help. Or if you want to embellish an existing project with a straight line of embossed dots or suns, or if you want to edge a card with a straight row of holes, scallops or sun tool impressions or a combination of these – there are PCA EasyEdge guide templates to help. These ruler guides usually come in two lengths 130mm and 260mm.

The PCA Easy Edge guide is notched with equally spaced gaps that are sized for the different PCA tools available.  The template is marked with the tool name it is designed for.

image

The template above can be used with the Medium Ball and the Mega Ball tools.

Sun tools give a really pretty embossed “sun” shape, you may want to create a row on suns in which case you would need a PCA Easy Edge for Sun Tools

imageimage-1

There are similar straight ruler guides for scallop edges and single needle holes or perforations.

There really are a lot of different guides to help you with card making. Here is a template to help you create a series of decorative perforations in an arc or semi-circle. The templates are made of transparent plastic so you can see exactly where to place them on your work.

image-5


Making an Aperture Card

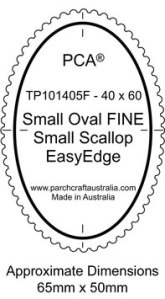
If you want to make an aperture card with a scalloped edge there are templates with differents size apertures for both small and large fine scallop tools.

image-2 image-1

Choose the size and shape you want for the aperture, that is – oval or rectangle? and small, medium or large size of aperture?

image-11image-12

So above you have a small size oval (40 x 60), the Edging Tool required is marked on the template as a Small Scallop and next to it, a small Rectangle also using the small Scallop edging tool.  PCA has created a youtube instructional video to help you get started.

The reverse template to the aperture is the oval templates with scalloped edgings – they are great for cameos, silhouettes or 3D elements to add to your cards. You can probably think of more uses.

image-10

There are many Easy Edge Guide Templates, I have only mentioned a few – here is one more rather useful template.

Wedding Stationery Place Setting

It is a pretty template for place settings with a scalloped edge, you can use your imagination to decorate these using parchment craft techniques.

image-1408-table-card-lindy__29449_zoom

This template uses the Large Fine Scallop tool for decorating the edges. There is an embossed area to place a name. There are more details on how to complete this project on a PCA You Tube video.

In Part 4 parts we will be looking at the new EasyCut Templates.

PCA Templates for Parchment Craft Part 1 Frames, Borders, Corners and Backgrounds

PCA Templates for Parchment Craft Part 2 Pictures

PCA Templates for Parchment Craft Part 3 Edge Templates and Guides 

PCA Templates for Parchment Craft Part 4 Easy Cut Templates

PCA Templates for Parchment Craft Part 5 Parchment Protectors and Words /Sentiments

PCA Templates for Parchment Craft Part 2

PCA Templates – Pictures and Motifs

Here is part 2 of the guide to PCA Template which is going to concentrate on picture and motif templates.

PCA have  a large range of picture templates:  butterflies, flowers, birds, a whole series of owl templates, fans, 3D projects, sport, hobbies and  celebrations like Christmas and Easter and loads more.

The templates can be embossed and used as greetings cards or on other projects such as gift bags, crackers, place settings, wedding stationery, house decor  or  as 3D elements on boxes or just as decorative additions absolutely anywhere. Here is a quick reminder on how to use the templates:

  • Take the template of your choice, place it with the tracks facing up.
  • Attach the parchment to the template with low tack tape or blu tack.
  • Wipe over the parchment with a tumble drier sheet or natural polish, this helps the embossing tools to glide over the parchment with ease.
  • Place some tissue (or use a parchment protector) under your hands as protection from finger prints on your parchment.
  • Using a micro ball tool or small ball depending on the template, start working from the centre towards the outside edge. Place the ball tool in the tracks and just follow the tracks this then forms the embossed line.

image-2image-11

Big and small butterflies!

PCA Christmas Templates

There is a huge range of Christmas PCA Templates available featuring Trees, Baubles, Sleighs, Santa, Reindeer, Holly borders, drinks Coasters and much more.

image-12 image-1

image-15

Above are three of the many Christmas themed PCA templates. They all have individual matching borders and motifs that can be added to your designs in the way that you want.

PCA Peacock Templates

Fabulous designs for peacocks which look beautiful as embossed line art and you can also add colour using inks or pencils, paint or pens.

image-16peacock-bloom


image-17stainedglasspeacock

Embossed work by kind permission of Sharon Mills (Parchment Craft Designer and Tutor)

Colouring

Here are some examples of adding colour to an embossed image. Colour can be added to the back or the front of parchment craft paper. This can be by Dorso or Oil pastel crayons, Pencil crayons such as Faber Castell polychromos, inks, acrylic or water colour paints.

tp3160e_easy_emboss_hearts-a-plenty__90907_zoom23-a-tp3160e-hearts-card__59710_zoom

image-14 wp

Colour can also be achieved by placing a coloured backing paper or parchment behind the embossed picture.

Mix and Match

Mix and match the border templates with the picture templates.

tp3191e-combined__83414_zoom

tp3149e_easy_emboss_simply_flowers_4__61270_zoom tp3149e-easy-emboss-simply-__98154_zoom

This card uses the Daffodis in the PCA Template “Simply Flowers 4” surrounded by a border PCA Template  Diamond Border 2 and looks absolutely gorgeous.  Use Ball Tools or Shaders to add light and shade to the images.

Part 3 of this series will concentrate on the Template Guides and Easy Edging Border guides.

PCA Templates for Parchment Craft Part 1 Frames, Borders, Corners and Backgrounds

PCA Templates for Parchment Craft Part 2 Pictures

PCA Templates for Parchment Craft Part 3 Edge Templates and Guides 

PCA Templates for Parchment Craft Part 4 Easy Cut Templates

PCA Templates for Parchment Craft Part 5 Parchment Protectors and Words /Sentiments